Award-Winning!

How to Make Interactive Worksheets with TeacherMade

What are Interactive Worksheets?

Interactive worksheets, or “interactivities” as we like to call them, are made with educational apps that take your favorite PDF worksheets and convert them into engaging digital materials delivered online to your students. Interactive worksheets challenge students in ways plain old paper worksheets never could because you can incorporate learning activities that are only possible on the computer. With interactive worksheets made with TeacherMade, you can also incorporate audio, video, and hyperlinks to transform learning beyond the printed page.

Teacher Creating Interactive Worksheets with TeacherMade

How are interactive worksheets different from paper worksheets?

Unlike interactive worksheets, paper worksheets are limited in how they can challenge and engage students. You can only ask questions or assign tasks that can be completed with a pencil or pen. Because of these limits, paper worksheets tend to be static and repetitive. Interactivities add the power of the computer to the worksheet so they have layers and levels that are not possible with paper worksheets.

Think about all of those times you included an excerpt from a speech for your students to read within a worksheet. With interactive worksheets, you can include a video clip of the actual speech for your students to watch! Watching the speech allows them to analyze it in ways they never could just by seeing it on paper. Deeper connections with the material are made for the student, making it memorable.

With other tools like hotspots, drag and drop, and audio, there are no limits to what you can do with interactive worksheets. Not only are students more engaged but the brain-friendly connections they are able to make within their learning are far stronger using these interactivities.

Are interactive worksheets the same as your favorite paper worksheets?

Deep down, all interactive worksheets are just paper worksheets that have been upgraded. So don’t go throwing away that filing cabinet filled with years of resources! Many of the questions that are asked on interactive worksheets are the same as those asked on paper worksheets. It is the way in which students are asked to respond that is different. For that reason, paper worksheets provide the perfect base for Teachers to expand on when they are uploaded to an educational app.

How do interactive worksheets increase student engagement?

It’s no secret that students love technology. By moving learning resources and supplementals like worksheets online, they automatically capture students’ attention far more than paper worksheets. And because TeacherMade allows students to check their own scores, the worksheet is gamified for the student. Teachers consistently report that their students try harder on interactivities in TeacherMade.

The technology-enhanced question types offer additional excitement for the student. Drag-and-drops have students take objects and place them in the right location or sequence. It’s a fun way for students to show what they know. Voice recordings open up a world of possibilities, too. Students can read a poem, speak in a foreign language, or express their opinions in a medium that’s more natural.

Interactive worksheets let students move at their own pace allowing them to take control of their education and be more creative with their answers. In many cases, students can upload links, videos, or even audio to support their responses and find new ways to express themselves. Did we mention that TeacherMade has instant scoring for the student as part of its auto-grading feature? The ability to see their grades as soon as they submit their work also gives students a sense of ownership over what they’re learning. They naturally want to try harder!

How do interactive worksheets reduce Teacher stress?

Where do we even begin?? Once a Teacher knows how to use TeacherMade, they can save hours of time when prepping for class. For starters, these worksheets are assigned online to your students. This means that once they have been created, which can take a few minutes to set up, they can be sent directly to your students. No more costly printouts or losing battles with the copy machine. Just a few clicks on your computer and the work is ready to go.

As we mentioned, TeacherMade is the only educational app for making interactive worksheets that offers auto-grading. When a student submits their work, you can automatically see the score they received. Gone are the long nights and weekends of grading student work! And since TeacherMade is integrated with Google Classroom, Canvas, and Schoology, student grades flow directly to your gradebook. This streamlined process cuts out the middleman, aka the Teacher.

All in all, interactive worksheets let Teachers breathe knowing that their students are doing more rigorous, challenging assignments while they have simultaneously less paperwork. TeacherMade gives Teachers back hours of time both in and out of the classroom. Teachers use these time savings to spend more instructional time with their students or just to relax (a term foreign to most Teachers during the school year).

Knowing everything that’s possible with interactive worksheets, it’s hard to imagine ever going back to paper worksheets. So which educational app should you use and where should you begin? Like most things in life, getting started is the scariest part. Lucky for you, we know just the app 😉

TeacherMade is The Online Worksheet Maker App Made for Teachers

TeacherMade takes your static PDFs and turns them into interactive worksheets that are easy to make and popular with your students. As a result, the best materials that you’ve curated over the years can now take center stage in your digital classroom.

Using TeacherMade is pretty easy. An upfront investment of time learning the basics will pay off for you for years to come. So let’s get started making interactive worksheets using TeacherMade.

How to Create Interactive Worksheets Using TeacherMade

Create Your TeacherMade Account
If you have not done so already, you will nned to create your TeacherMade account. To do so, go to https://teachermade.com and click “Sign up FREE” in the upper right corner of the homepage.

You can choose to create an account by typing in your information or registering with a Google account. We highly recommend that you sign up using your school email address, as it will make it easier if you choose to use one of our LMS integrations.

It is important to note that only teachers need TeacherMade accounts. Therefore, no student needs to or should be signing up for TeacherMade.

Once you are all signed up, the application will take you to a page titled ‘My Worksheets.’ This page will host all of your assignments and folders once you start creating them!

Turning PDFs into Interactive Worksheets

TeacherMade - Create Worksheet

To make an interactive worksheet, start by selecting “Create Worksheet” in the upper left-hand corner or select ‘Actions’ in the right corner and then “Create Worksheet.”

The Basics

First, you will need to give your interactive worksheet a title. You, your students, and any teacher you share the interactive worksheet with will see this title.

Next, you will have the option to add this interactive worksheet to a preexisting folder and then give the assignment a description.

Both of these steps are optional!

Finally, you will choose the background of the assignment you are creating. You can either upload a document from your computer or leave the background blank if you would prefer to make a worksheet from scratch.

Time to Upload Your Worksheets

You can upload any jpg, png, gif, pdf, or Docx file that is 12 pages or less. If you have TeacherMade PRO you can upload up to 25 pages. When you upload a document, TeacherMade turns it into an image and then places it in the background of the assignment.

For this reason, it is best to make any edits to your document before uploading it to TeacherMade. For example, if your PDF is landscape, you will want to rotate it into portrait orientation on your computer before uploading it.

Once you have filled out the necessary information and selected a background, choose “Make My File.”

Converting Your Worksheets to Interactive Worksheets

Once you have uploaded your PDF, the website will redirect you to the “Edit Worksheet” screen. Here, you will have access to a full toolbar with TeacherMade features to make your PDF a fully interactive worksheet.

TeacherMade Features to Add to Your Interactive Worksheets

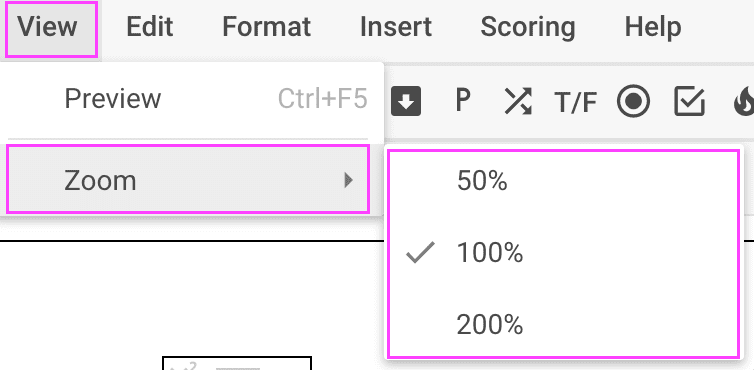
When creating your TeacherMade assignments, you have 12 different question types to choose from. To access them, either select their icon on your toolbar or pick “Insert” and then select the kind of question to add.

Let’s walk through the different types.

Insert Different Question Types on TeacherMade's Interactive Worksheets

Short Answer

This feature is represented by the ‘T’ on your toolbar and is meant for short one or two-word answers that can be auto-graded. You will only be able to see the words that fit in the physical box. Students will not be able to indent or type long paragraphs.

To use this feature, select the tool on your toolbar and then draw an answer box where you would like it to be on your assignment.

To set the correct answers for a Short Answer, highlight it and then click on the “Edit Short Answer” tab found below the toolbar. A pop-up window will appear.

Type in the correct answer(s) and assign points. You can choose to add up to 10 correct answers and give a max number of 10 points.

You can choose to give points only when the correct capitalization is present in the student’s answer by checking the box next to “Answers must match case (upper or lower) to be correct.” You can also choose to ignore a student’s punctuation by checking “Ignore punctuation marks in student answer.”

If your assignment requires multiple short answer boxes, don’t waste your time creating each one. Click on the first one you make to highlight and then select Control + D. This will duplicate the box and allow you to move it anywhere on the assignment.

TeacherMade - How to Insert a Dropdown

Drop Down

For a drop-down style question, you will want to select the downward arrow on the toolbar and draw the box where you’d like it on the assignment. You can insert up to 10 answer choices and choose one correct answer. This feature can be auto-graded and you can also use Control + D to duplicate this question

How to Insert an Open Answer - TeacherMade

Open Answer

This question type is represented by the ‘P’ on the toolbar and is meant for longer answers that cannot be auto-graded, like an open-ended question. Using this feature, students will be able to hit enter and create a paragraph regardless of the physical box size.

In addition, the application will create a scrollable window as they type that will let them and you see all of their work.

How to Insert a Matching Question - TeacherMade

Matching

Select “Matching” and then draw boxes around each option and their match/answer to use the matching tool. Then hold down the ‘Shift’ key and as you do so, select two choices to match them. Students can only match each option with one answer.

To assign a point value to each question, select ‘Edit Matching’ on the toolbar. Use Control + D to duplicate the matching box and drag them onto each answer choice.

How to Insert a True or False Question - TeacherMade

True or False

Select the T/F false from the toolbar and then choose from one of these true or false orientations.

Draw a box by the question and simply click on the correct answer. The default score will be one point. Click on “Edit True or False” to change the point value.

How to Insert a Multiple Choice Question - TeacherMade

Multiple Choice

Select the circle icon on your toolbar and then choose the number of answer choices your question requires.

Again, you can click the correct answer right on the screen and open up the “Edit Multiple Choice” to select a point value. There can be only one correct answer when using this feature.

You have a few different formatting options with multiple-choice features.

Next to the “Edit Multiple Choice” button, you have the option to make the multiple choice box transparent. You can also orient the multiple-choice from left to right instead of top to bottom if you would like. To do so, select the item and resize using the bottom right corner, moving it up and to the right. The box will automatically switch its orientation.

How to Insert a Checkbox in TeacherMade

Checkboxes

This feature is similar to multiple-choice, but you can select more than one correct answer. You also can have up to eight answer choices.

In addition, you can make the same orientation edits. Make the box transparent by checking the box next to “Edit Checkboxes” and can also orient the checkboxes from left to right by dragging the bottom right corner up and towards the right.

How to Insert a HotSpot in TeacherMade

Hotspot

This feature allows you to make any part of your worksheet (i.e., part of an image or diagram) the correct answer! The answers are usually a part of a group. Start by selecting the flame icon on your toolbar and then inserting a box around the first part of the image that could be an answer.

Continue adding these boxes until each answer choice has a box. For example, to create a “group” or question, click on the first hot spot you want to include, hold the Shift key down, and then click on the rest of the hot spots that are part of the group.

When assigning points to a hotspot question, you have the option to click, “The student should click this hotspot” or “The student should leave this hotspot unclicked.”

Students will need to select one of these hotspot boxes as their answer when answering the question. In addition, you have the option to add a border around each of the individual hotspots, change the Color of these borders, and make the corners of the hotspot rounded. This question can be worth up to 10 points.

How to Insert Number Fields into TeacherMade

Basic Math Question Types

Use the Math tools to draw short response areas on your worksheet that are pre-formatted to accept numbers, math symbols, and operators. For example, when you click on Math tools, you will choose one of the following types of problems:

a. 123 Number Choice: This choice will accept numeric characters and symbols only. You can list up to 10 correct answers for this question. As this question is, students are restricted from using commas, minus/negatives, and decimals when typing in their responses.

When inputting correct answers, you have the option to allow your students to use any of these digits. You can also change the font, font size, the color of the text, and the border color when adding this question type.

b. Fraction: The middle line provides the student with response boxes above and below to enter a numerator and a denominator. You can add up to 10 correct answer choices for this question by selecting “Edit Fraction.”

c. Mixed Number: displays a box for a whole number in addition to the fraction response. Thus, you can add up to 10 correct answer choices for this question.

Use Control + D to duplicate any of these response boxes.

Algebraic Expression

This feature is meant for student responses that require more complex math equations and formulas. When you input this feature, students are provided with a math LaTex equation editor that they can use to answer the question.

You have access to this same toolbar when adding correct answers for the question.

You can add up to 10 correct answers for this question, and it can be worth up to 10 points.

When your students open their assignment, they will not see this LaTex equation editor until they select the algebraic expression text box.

More TeacherMade Tools that Bring the Power of Media and Links to Your Favorite Interactivities

Your TeacherMade toolbar gives you access to much more than just the different question types. You also have access to 7 tools that will add additional levels of engagement to your interactive worksheet.

Use the TeacherMade Toolbar to Customize Your Interactive Worksheets

Teacher Text

This feature allows you, as the Teacher, to add text to your interactive worksheet that students will see but not edit. This is perfect for adding your instructions, hints, and reminders for your students to have as they complete their work.

To use this feature, select the “T” from your toolbar, draw a box anywhere on your interactive worksheet, and type the text you would like to add. Then, to edit the properties of your text (style, font, color), simply click on “Edit Teacher Text.”

READ MORE

TeacherMade Image Gallery

Insert Images into Your Interactive Worksheets

To upload an image to your assignment, select the Image icon to the right on your toolbar. Next, draw a box on the worksheet where you want the photo placed, and the Upload an Image box will appear.

Choose an image from your computer that you would like to add to your Gallery. Then click on that image, and it will automatically paste it into the box you drew on your assignment.

You have the option to resize the box, color the border around the image, lock the aspect ratio, and make the background transparent. Your students will not be able to edit the picture when they open the interactive worksheet.

Color Block

This feature allows you to draw a “color block” on your assignment to cover whatever it is placed on top of. This feature is great for covering up parts of an assignment that you don’t want your students to see.

For example, if the PDF you uploaded also includes the answers to the questions, you can place a color block over these answers so that your students cannot see them!

To use this feature, select the eraser icon to copy the image icon. Draw the color block wherever you would like it on the assignment.

Once it is on the interactive worksheet, you can edit its size, move it around, fill the color, and add a border. Your students will not be able to move this color block as they complete the assignment.

Insert Audio with TeacherMade

Insert Audio into Your Interactive Worksheets

To add audio to one of your interactive, select the Audio tool (represented by a microphone) on the right side of your toolbar. You may also choose Audio Recording on the Insert menu.

Next, draw a box on the assignment where you would like an Audio icon to render, and you’ll see this appear:

This is the same icon your students will see on their assignment. This message will pop up on your screen once you draw the audio box:
Your first option is to record your audio. To begin recording, click the red circle. You can record for up to 5 minutes! To stop recording, click on the grey square.
Click the “Attach to the Worksheet” button at the bottom of the window when you’re done.
Your audio recording will now play when students click on the Audio icon in their assignment. This is what they’ll see when they click to play it:
Suppose you want to listen to your audio, select Preview from the View menu, and click on the Audio icon. If you’re going to re-do your recording, exit the Preview, delete your Audio icon from your worksheet, and start over.
Your second option is to upload your audio from your computer. To do so, click the “Upload” tab to the right of the “Record” tab. You will see this box appear:

Select the audio file you would like to upload, and you will see the title of the file appear where it says, “Upload an audio file.”
Once you see your file’s name, the option to “Attach to the Worksheet” will also reappear. Click this option to add your audio file to your worksheet, and then you are done!
Follow the same steps mentioned above to preview your audio and to see what your students see. NOTE: When uploading your audio, there is a file limit of 10 MB.

Insert a Hyperlink

Insert a Hyperlink into Your Interactive Worksheets

The hyperlink tool is found on the right side of the toolbar and looks like a paper clip. Use this tool to insert URLs, Google Docs, Google Slides, YouTube videos, etc., into your TeacherMade activity.
This tool can have a powerful impact on your activities by bringing the Worldwide Web to your students! It’s very easy to use.
To insert a hyperlink, select the link button on your toolbar or select Insert and then link.
Next, draw a box on your assignment where you would like the link to be. You have the option to edit the color of the border around the box, the font, size, and color of the words in the box, and choose if the box is transparent or solid.
Next, select ‘Edit Link.’

Enter the link you would like to hyperlink (must include http:// or https://) and an optional label. If you do not use a label, your students will just see the border around the box. If you choose a label, it will be inside the box for them to click.
We suggest previewing this page before assigning to ensure the hyperlink is easy for your students to recognize. When your students click on the link, the website will open in a new window.

Draw Tool

Draw Tool

The pencil represents this feature on your toolbar. To use this tool, simply click on it and start drawing! You have the option to draw freehand in a link, a circle, and a rectangle. You can also edit the color of your drawing tool along with the width of the lines.
Use this feature to circle important information, add notes, and point your students in the right direction! But, of course, your students will not be able to edit anything you draw on the assignment.

Highlighter

The highlighter icon on your toolbar represents this feature. To use it, click on the icon and start highlighting!
In addition, you can change the color of the highlighter.
Use this feature to highlight important information and bring attention to parts of the assignment you want to be sure your students see. Your students will not be able to edit anything you highlight on the assignment.

Eraser

This feature is represented by the eraser on the far right side of your toolbar. It will erase any drawings or highlights you’ve made on the assignment.
To use it, simply click on the eraser and then click on the drawing or highlighted area you would like to erase.

Tricks to Keep in Mind While Creating Your Interactive Worksheet

Like most technologies these days, creating assignments on TeacherMade.com will take some getting used to. However, you will learn as you go, and the time it takes you to make an online lesson will quickly diminish!

To make things even easier for you, we want to share some of our favorite tips and tricks that we would not be able to create a worksheet without!

Duplicating Items

Want to duplicate an item you added to your worksheet? Click on the object to highlight it and then select Control + D. Drag this new object wherever you want. Want 5 duplicates? Hit Control + D 5 times! It’s that easy.

You can also select “Edit” on your toolbar and then “Duplicate” from the menu. When you duplicate an item, the answer choices you have added and then point value are also duplicated.

READ MORE

Preview Your Interactive Worksheets in TeacherMade

Preview Your Interactive Worksheets

This feature is a lifesaver if you want to see exactly what your students will see when they open an assignment. To use it, click on the far left icon on your toolbar that looks like a computer screen with an eye in it. You can also select, “View” on your toolbar and then, “Preview” from the menu. Clicking this button will bring you into preview mode.

Once in preview mode, you will be able to answer each question you have added to your assignment, test out hyperlinks, listen to audio, and check your answers to ensure that each of the auto-graded solutions you set is correct!

Many Teachers have also used preview mode to create a video and show their students how to use different features on their end of the assignment.

This feature is a must if you’re looking to have more control over your project! Use it as many times as you’d like as you’re creating your work.

Zoom Buttons

Zoom Buttons

The next helpful feature is the zoom buttons on your toolbar. Are you tired of squinting at the words you’re typing onto the assignment? Use the “Zoom In” feature to get a better look at what you’re typing. Then, when you are done looking over your work in detail, simply zoom out.

You can also select, “View” on your toolbar and then, “Zoom” to be given these options:

Add Backgrounds to Your Interactive Worksheets

You can change the background of your worksheet any time before you assign it to your students. To do so, open up the worksheet and choose “File,” and then “Change Background” on your toolbar.

Any TeacherMade features you have already added to the assignment will remain on the assignment. This works best if you need to edit the PDF you originally uploaded from your computer.

Insert Blank Spaces

Blank Spaces

You can also add blank space to your assignments if you need more room to add questions! To do so, click File, “Add Blank Space,” and then select the amount of blank space you would like to add.

For example, you can choose between a ¼ inch, ½ inch, 1 inch, quarter page, half page, and a full page. The application will add this blank space to the end of your assignment.

Default Border

Add a default border color so that all of your added features look the same! To do so, select “Format” and then “Set Default Border.” If you have already added features to the page, simply click “Update all Border.” The program will change all current borders to the default settings.

Give Interactive Worksheets a Score

Give Your Interactive Worksheets a Default Score

You can also set a default score! This feature is great if you have a worksheet where each question will be worth the same amount. Set the default score at the beginning of creating the assignment; then, you won’t have to set the score for each one.

To do so, click on “Scoring” and then “Set Default Score.” Once again, if you have already added questions, select “Update All Scores” for these scores to be set to the default.

Help Tools for Your Interactive Worksheets

Although these tools are not needed to create a TeacherMade assignment, they will make your life easier as you go through the steps to build an assignment. If, at any point, you are confused or have questions, simply click on the “Help” button. This will provide you with a menu of help videos and detailed instructions on using each of the tools we walked through above!

Work Smarter Not Harder - Share Your Interactive Worksheets with Other Teachers!

Have you made some great digital worksheets that you wish you could walk right down the hall and give to your colleagues so they could use them too? Although that is difficult to do with a digital worksheet, we have some good news!

Sharing TeacherMade assignments is just as easy, if not easier, than walking down the hall.

To start, find the interactive worksheets that you would like to share and click the three dots to the right of its name. A drop-down menu will appear. Select “Sharing” from the menu. You will see this pop-up message:

To share interactive worksheets, you will need to select the drop-down menu where it says “Disabled” and then select “Enabled.”

To share your work, simply copy the link you are provided and send it to any Teacher you would like to share the assignment with.

Sharing interactive worksheets does not mean that the Teacher will be able to see your own student’s submissions or grades. Anyone who receives this link will be prompted to make a copy of the assignment meaning that it will be completely separate from your assignment. Sharing is simply a way to share content.

When they open the link, they will see a copy of the worksheet and this at the header:

Once they click “Make a Copy,” the application will create its version of the assignment. Since a copy is created, it will not be possible for them to edit your original version of the worksheet.

Instead, they will be able to make changes to their copy and assign it to their students.

And Just Like That, You Have Interactive Worksheets! Now What?

Now that you know how to build interactive worksheets let’s move on to assigning a TeacherMade task!

Learn about what makes TeacherMade the best interactive worksheet maker!